Okey,.. since today is in service day in my school, I want to show you about my last order, that is Engagement Ombre Cake. Do you know what is ombre? Ombre is gradation color. Some people said, ombre is the popular thing after rainbow, that is very popular now. Anyway, this cake is ordered by my aunt Olivia for her engagement tradition (Chinese, I think :P) that is exchange tray. She asked me to design with 2 layer "real" cake (I mean, not dummy cake) and she want to have 2 fondant figurine of her and her mate. And, with all may creations, I made this cake!
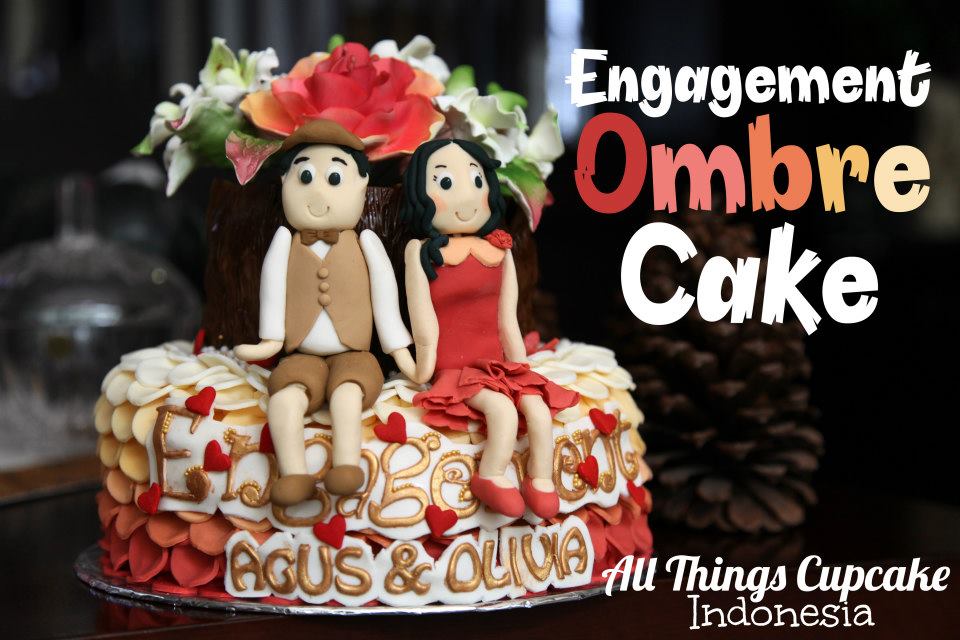
The ruffled idea is came from CAKE COUTURE Books by ANNIE DAM. It was a great book, with step by step amazing decorated fondant cake. I made this cake about 8 hour. 4 hour is made the top part and half of the ruffled plus making and drying the figurine, 4 hour in the next day is finishing the ruffled, making the engagement word and names then paint them and finishing part.
The ombre color is similar to the flower color (planned). The color is made by the mix of burgundyand red, and there is yellow color that is mixed of yellow and ivory. The other color is mixed by both of them and for the lighter color, mixed with white fondant. The pot (wood) is made by painting of a mixture brown food coloring mixed with food grade alcohol (you can use lemon extract or vodka if you wish). I did that because, I found that brown color is difficult to get by mixing the food color to fondant, like most of case to get deep red and black fondant. The texture of wood is using Makin's Texture sheet.
For the engagement words, I'm using FMM Funky alphabet and the names are using JEM alphabet. Both are using fondant that mixed by CMC powder to make it strong when it dry. The key of using any detail alphabet tool like FMM is very thin of fondant. The best way to do it is by using rolling pin that have "rings" that you can adjust the thickness of your fondant. If your fondant is not thin enough, it will stick at the tools. There is many tutorial at youtube that really help me to work with this tools. To make the gold color for the words, I'm using gold lustre dust and mixed with a little alcohol, than just brush at the alphabet, if the color is not gold enough, you can brush lightly the dry gold lustre dust to the alphabet, just remember, to much bushing with alcohol can make your alphabeth soggy, but if you have much time, the alcohol will evaporate anyway. :)
And the last thing I want to say is, Congratulation to my aunt and her mate for the Engagement!
Yeah, that's all I can't share with you today, I you have any question, please, I'll not bite you! :P
Very BIG smile,
Ivan
No comments:
Post a Comment